Take a short few minutes to watch this video for the quickest way to become familiar with the people profiles app on OpenScholar.
For more information, you can read the written documentation below.
Maintain a directory of people, collaborators, and contributors to your project or organization.
Content and Formatting Guidelines
For field level details and intended use - please review the guideline (.pdf).
Enabling the Profiles App
Before adding any people, you must first make sure the app is enabled.
1. Click to expand Settings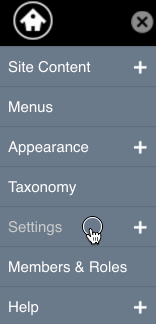
2. Click on Enable Apps
3. Search for PROFILES.
4. In the drop down menu, click EVERYONE.
![]()
5. SAVE CONFIGURATION at the bottom of the page.
Return to Home Page
Profile App Settings
In the settings of the Profiles App (in your Control Panel - click to expand Settings - select Profiles), you can control the display of information and enable a default image to appear next to the profiles listed on your site.

People Menu Link
If the "People" link does not appear in your menu, follow these steps:
- Go to the control panel and select Menus
- Once in the Menu area, Select Add New Link in the Primary Menu
- You'll be prompted to choose an Item Type. Please select URL
- Click Continue
- Now give the Menu Item a title like "People" and enter the word "people" (lower case) in the URL field
- Click Finish at the bottom of the page
Controlling the Teaser Content
The "teaser" is the text (which is being pulled from the bio field) that appears on the main page under the Name of each person. When more content is available in the full post a “Read More” link will display.
Example:

You can control the teaser by placing your cursor in the bio text and selecting the teaser icon in the text editor: ![]()
Understanding People Profiles
You have 3 options to add people when using the Profiles App:
- Creating new profiles
- Importing profiles
- Syncing profiles from another OpenScholar site
Creating New People Profiles
1. Click on the People link in your primary menu.
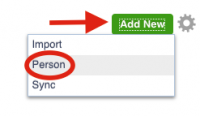
2. While on the People page, click on the green "Add New" button and select "person".
3. Fill out the form
4. Save
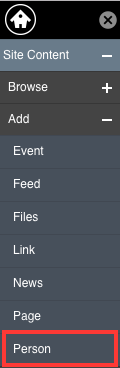
Note: you can also add people from the administrative tool bar:
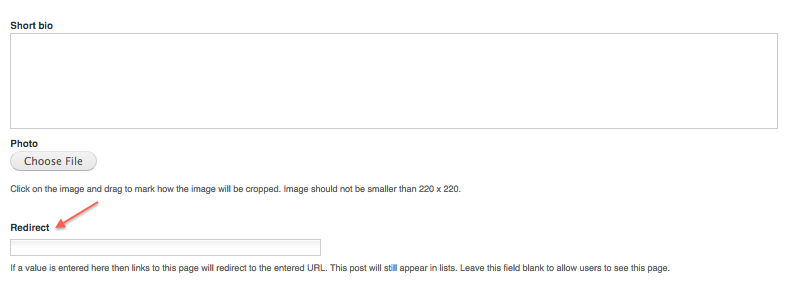
Using the Redirect Field
If a person already has an external website or short bio, you can use the "Redirect" field to send visitors directly to the external site after clicking on the person's name on the list page. In the add/edit form, enter the URL of the external website in the "Redirect" field.
Content Revisions
The content revisions feature will allow you to save past versions of content (posts) on your website.
Viewing Profiles
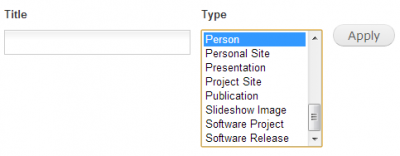
All of your people profiles can be viewed by clicking on "People" in the primary menu of your site. You can also view and manage profiles by navigating to the Control Panel and clicking on the "Content" button . On the right column under "Type" you will see a drop down menu where you can click on "Person" which after applying will display a list of your people.
Images (crop ratios) for People Profiles
Images are displayed in different aspect ratios depending on the theme selected for your site and the context in which they are displayed.
Images need to be at least 220 pixels x 220 pixels to display correctly. They should all have extra room on all four sides of the person's face , about 10% is ideal to allow for the multiple ways in which images are displayed.
Adding New Personal Website Directly from Main Site
After creating a person's profile on your website, you now can opt to create them an individual/ personal website.
1. Click the "Create a personal website..." link
2. Name your URL
3. Find more about Going Live with any new site.
Updated: 21Apr18