Take a short few minutes to watch this video for the quickest way to become familiar with creating custom membership roles on OpenScholar.
For more information, you can read the written documentation below.
In the Members & Roles area of the Control Panel, you can create new roles to further customize the maintenance of your site. 
Steps to create a new role:
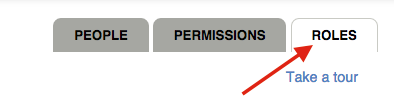
1. Click the "Roles" tab on the upper right hand side of the People page
2. Select the "Edit roles and permissions" button and confirm this request.

3. Give the new role a name
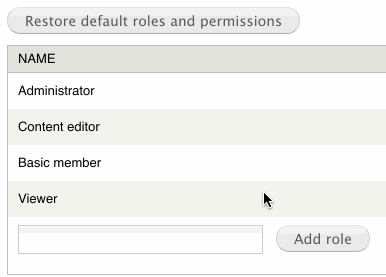
Example: Here the name of the new role is Intern

4. Go to the "Permissions" tab 
5. Select the functionality that you want the new role to have by toggling the boxes.

6. Click Save at the bottom of the page
Now you can associate a site member with the new role.
Updated: 3May18